Harvest Reminders Part 1

Joy Ting

August 2018

Harvest is here! Representative Vineyard Sampling Sample Preparation and Testing Rot Protocols High pH and Acid Adjustments

Harvest is here!

Though this season has been a challenge in the vineyard, the grapes are still ripening and it is time to start picking! 

So far people have reported higher than normal pH, lower brix, and watery fruit. Not a surprise given the weather. But today the sun is out and the forecast (at least for a few days) looks pretty good. Lets hope this weather holds.

Following are a few reminders as you go through this season.

Representative Vineyard Sampling

Vineyards are variable places. No matter how well you sample the vineyard, it is still a sample; you will never know for sure based on a sample what the true value is. Any sample you take has a range of accuracy depending on the amount of variation in the vineyard, the variety, and the vintage. As you design your sampling scheme, it is important to be aware of the types of variation that matter most, and account for those in the sampling plan to obtain the most representative sample. There are several layers of variation to take into account as you sample.

The first thing to consider is whether the vineyard is relatively homogenous or not. Zoecklein (Enology Notes 53) says that the three things that make the most difference in maturation are heat, light, and soil moisture. If you know you have an area that will ripen differently due to disease, aspect, or other factors, make sure you incorporate this area in the correct proportion. Alternatively, you could sample this area separately, but add it back to your normal sample in the correct proportion. Also, if there has been a frost event and the vineyard is split into primary and secondary clusters (as in 2020), sample separately and recombine in the proportion found in the vineyard.

In addition to large spatial differences, there are also smaller scale differences to be aware of. Ripening maybe different based on:

  • Exposed vs shaded areas on the vine
  • Opposite sides of the row
  • Different parts of the vine (close to the trunk, middle of the cordon, end of the cordon)
  •  Different parts of the grape cluster
  • Edge effects: Avoid end vines and perimeter rows

 Sampling bias can also be a factor in the accuracy of a grape sample. As humans, we tend toward a bias of picking grapes that are most apparent, and most ripe. To minimize the effect of sampling bias, it is good to have a methodology for sampling that includes intentional sampling in a way that takes this into account.

Practically, what does this mean?

The instructor for my Davis classes suggested following a prescribed method to keep yourself accountable:

  • Take a berry from every 10 vines in the row, alternating sides.
  • Skip rows so you cover the whole block; if you make 4-6 passes alternating sides, you have sampled 8-10 rows
  • Think of the different sections of the fruiting zone of the vine. If you have upper and lower clusters, and center, midpoint and end, sample these in order each time: Upper End, Upper Middle, Upper Center, Lower End, Lower Middle, Lower Center. Amerine and Roessler (1958) found that 90% of variation in a berry sample is due to variation in the position of the cluster on the vine and degree of sun exposure.  
  •  Also, think about the parts of the cluster. Top, middle, and bottom, front and back. These grapes can all contribute to variation. That same professors suggested a “modified cluster sample” to reflect the differences found within the cluster: taking one berry from the top, one from the bottom, then successive berries as you burrow to the middle of the cluster in the center. This would mean taking 7-10 berries from one cluster on a vine, but still allow you to sample from a wider range of vines in the vineyard.

When sampling, consider the different regions of the grapevine. Amerine and Roessler (1958) found that 90% of variation in a berry sample is due to the position of the cluster on the vine. (UC Davis Vineyard Sampling 2016.

Berry vs. Cluster vs. Sentinel vine sampling

Amerine and Roessler (1958) compared three sampling methods: berry, cluster, and sentinel vine sampling. When they compared the results of berry samples (100-200 berries), cluster samples (10 clusters each) and whole vine harvesting, they found they all averaged around the same mean Brix level. However, the variation between samples was least for berry samples and most for whole vine samples. This means that the range of possible answers when they sampled these 10 times was wider for whole vines and clusters than berries.  They concluded that sentinel vine sampling is best for uniform vineyards and clusters are best for varieties that are known to have large variations within clusters, but berries are most appropriate for most varieties.  

 Zoecklein (Enology Notes 54) recommends the following guidelines for sampling size:

  • Within 1 degree Brix: 2x100 berries or 10 clusters
  •  Within 0.5 degree Brix: 5x100 berries (no cluster number is given)

 Ultimately the best way to determine the sampling method that is most accurate for your vineyard is to do both types of samples just before harvest, and see which is most accurate once the harvest comes in. Sounds like a great experiment!


References:

Determining Grape Maturity and Fruit Sampling, Ohio State University Extension, 2014

Enology Notes #53, Bruce Zoecklein, 2002

Field Testing of Grape Maturity, Amerine and Rossler, Hilgardia 28:4 p93-114

UC Davis Wine Production (VID252), Vineyard Sampling module, 2016


Sample Preparation and Testing (Vineyard, Ripening and Harvest)

Vineyard sample preparation and testing

In order to get the most accurate measure of fruit chemistry, it is important to prepare your fruit samples properly and make sure your lab equipment is properly calibrated. Also, there are a few things to remember when measuring Brix, pH and TA on juice.


In the field 

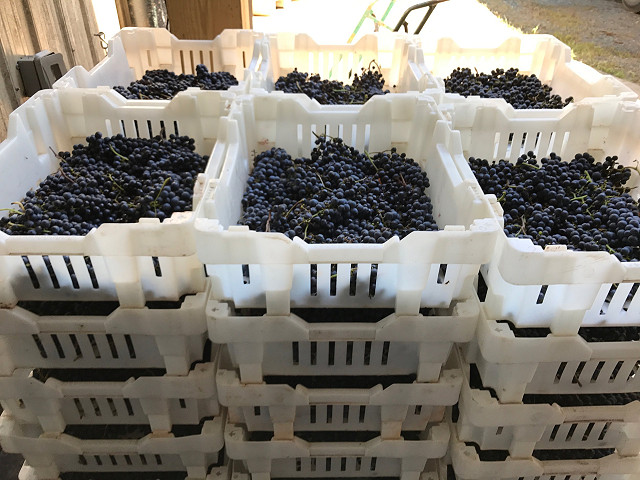
It is helpful to sample at the same time each day, preferably in the morning. Samples should NOT be kept in a hot car through the day, as they will internally metabolize and change both sugar and acid. Also, when taking vineyard samples be sure to label all samples clearly so that your lab tech (or yourself) will be certain where these grapes came from! It is helpful to keep a kit in your car that includes a Sharpie, plastic ziplock bags (the larger ones, so you can fit a large enough sample to be representative), and a small cooler with an ice pack. No need to freeze the grapes, but just keep them from overheating.  (It is also helpful to have some cleansing towelettes. Grapes are sticky.)


In the lab

When you get the grapes to the lab, treat the grapes the same way they will be treated when they are picked.  If you will be macerating them on skins after harvest, macerate them on skins in the lab. If you will be whole cluster pressing, then make sure to separate skins and seeds right away.  Either way, make sure to macerate fully, attempting to achieve the same pressure each time, without breaking seeds.  Studies have found that grapes macerated in the blender have accurate brix but not acids (the pH is 0.2 higher than when macerated by hand).

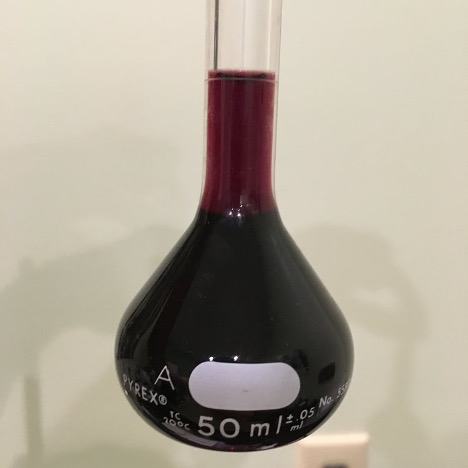
After you have separate skins from seeds, make sure you allow juice to settle before reading brix with a hydrometer, and before measuring pH and TA. Also, if the juice is fermenting, the TA will be erroneous due to dissolved carbon dioxide, so you will need to degas the sample before you do your reading.


Measuring Brix

Brix is a measure of soluble solids where 1 degree Brix = 1 gram solute in 100 g of juice. In grape juice, sugar makes up roughly 90% of the soluble solids. Hydrometers and refractometers use different methods to measure soluble solids (density vs. bending of light). Both should be compared to standards each day to ensure the device is properly calibrated.  Distilled water should give you a measure of zero. Brix standards of 20 and 25 are also available (Enartis), or could be made in the lab, which can also be used to make sure your instruments are giving accurate readings.  Most refractometers allow you to turn a dial to set the zero point if it is off.  If you are using a digital refractometer, make sure to zero to distilled water, and always make sure your sample well is clean before you calibrate. You should calibrate and check standards every day before you test your samples.

Refractometers and hydrometers are also temperature dependent. Some come with a thermometer that will self correct, but some do not. If your device does not come with a thermometer, tables are available online to determine the correction for your sample temp.

One addition thing to note, if you are using your hydrometer to determine when your fermentation is complete, keep in mind that the hydrometer is reading the density of the liquid relative to the density of water. Alcohol is less dense than water, so as the fermentation proceeds, the hydrometer reading is going down due to both sugar depletion AND alcohol accumulation. A finished wine will have a negative hydrometer reading. How negative the reading is depends on the alcohol of the wine (so Petit Manseng will be more negative than Sauvignon Blanc).


Measuring pH

You must calibrate your pH meter with standards of 4 and 7 at least once per day. Twice per day is better during a long harvest day. pH is a logarithmic scale, which means there is a 10 fold difference between a pH of 3 and pH of 4. When the meter begins to drift, it is time to calibrate again, since often the difference between pH = 3.25 and 3.35 may determine when to harvest.

After you calibrate your pH meter you should re-check with standards. The best standards are in the range that you will be reading. This may include a box wine you have had tested at a commercial lab (also a good standard for other measures such as TA, alcohol, and any enzymatic tests you may be running).  Also, 1 gram of cream of tartar (the same thing you use for seeding wines that are being cold stabilized) dissolved in 100 mL distilled water has a pH = 3.56. This is a supersaturated solution, so as long as you have more than 1 gram, you can just scoop without measuring.  

pH determination is also temperature dependent. It is best to calibrate your pH meter with standards that are in the same temperature range as you samples. Most pH meters have thermometers that will allow for temperature correction, however samples that are far away from the calibration temperature may not be accurately corrected.


Measuring TA

There are a few things to remember when measuring TA that will help these measurements be more accurate. Make sure your NaOH standards have been checked (weekly) for normality. There is a simple protocol for this. If you would like a copy, feel free to email and I will send you one. If your NaOH has started to lose its strength, your TA numbers will be inaccurate.  Make sure you settle the juice samples before you test TA, and your pH probe has been calibrated properly.  You will also need to degas any samples that may be fermenting. This includes grape samples that sat too long in someone’s hot car.  Carbon dioxide dissolves in grape juice to form carbonic acid, which will give you a higher TA reading. Post fermentation samples need significant degassing to yield reliable readings.


Sensory Evaluation

There are over 700 compounds in mature grapes, some of which contribute to wine quality. Not all of these change at the same rate as sugar during grape ripening. Grape sugars make up 90% of the soluble solids in grapes, but the rest includes important molecules such as tannins, polysaccharides, pigments, acids, protein, potassium and others. Most of the time, these are not measured in traditional grape testing. So, it is important to also taste the juice. 

It is important to taste samples successively over time to calibrate your palate to the flavors of unripe, ripe, and overripe juice. It is best to taste the samples before they have oxidized. Juice from grape samples often oxidizes very quickly due to lack of SO2 and the presence of active oxidative enzymes. If you must delay tasting juice, put the juice in the refrigerator to slow down these reactions. However, make sure you have measured the acids and sugar before doing this, as cold temperature affects brix determination and also can cause precipitation of acids.

Many flavor compounds that will be present in wine are in bound forms in juice, and will not be perceived until the enzymatic reactions of the yeast release them. However, as grapes ripen there is an evolution of flavor. Bisson (2001) illustrates the evolution of grape flavors as follows:

Vegetation ----> Herbaceousness ---> Unripe Fruit -----> Red Fruit -----> Black Fruit -----> Jam

In the same paper, she suggests a textural evolution from crisp and juicy to jammy and gummy which coincides with the softening of berries due to changes in their cell walls.


Additional measures of maturity

Though the lab numbers are helpful in tracking fruit ripening, other measures of maturity are also available. Seeds move from green to brown as the tannins are oxidized and lignified. Skins become more extractable and red berries will color the juice faster as cell walls begin to break down. Stems may change color from green to brown, though this may not happen in all varieties in all vintages. Oxidation of juice may become very rapid if fruit is overripe or infected with Botrytis. All this means that the lab numbers should be supplemented with sensory analysis and visual observation of the grapes, both in the vineyard and in the laboratory.


References

Determining Grape Maturity and Fruit Sampling, Ohio State University Extension, 2014

Evaluation for Wine Grape Maturity for Harvesting, Vineyard and Vintage View, 1995

In search of optimal grape maturity, Linda Bisson, Practical Winery and Vineyard Journal, July/Aug 2001


Rot Protocols

“Like when you bring your umbrella, it won’t rain, or put snow tires on your truck it won’t snow, you give me the protocols and I won’t have any rot!” (Tim Jordan, Barren Ridge Vineyards)

It is in this spirit that I include a section on handling compromised fruit. It is good planning to have a protocol in place in case fruit gets infected with Botrytis or sour rot. Not all fruit is infected for the same reasons, and some of these interventions are more useful for one kind of infection than another, but there are some things to keep in mind in terms of winemaking with compromised fruit.  I have included a summary as well as references and links to additional resources, should you need them.


The culprits

The primary forms of infection you will see are Botrytis and sour rot. Though also associate with noble rot, in Virginia, Botrytis is really bunch rot. This fungus infects the skins of grapes and compromises their integrity, leaving grapes susceptible to co-infection with acetic acid bacteria and other fungi such as Candida. Botrytis produces the enzyme laccase, an oxidizing enzyme that is not inhibited by alcohol and therefore persists after fermentation is complete. It also produces enzymes that degrade esters and terpenes, lowering the varietal character and overall fruitiness of wines. Botrytis uses much of the grape’s natural nitrogen and thiamine, and produces botrycine, a polysaccharide that triggers yeast to produce acetic acid later in fermentation. Not noble at all.

Sour rot can also be a problem in Virginia. Sour rot is caused by a constellation of microorganisms that opportunistically infect grapes whose skins have been compromised. Birds and yellowjackets are common culprits. These infections contain a number of microbes including Acetobacter and Zygosaccharomyces, with the overall effect of producing acetic acid.  Telltale signs are the smell of vinegar in the vineyard, though ethyl acetate production is also a problem in the wine.

Whichever rot you are dealing with, there are several things you can do as a winemaker to limit their effects. You will not be able to return the fruit to its former glory, but you may be able to save the wine enough to have a salable product. Here are some things to consider:


General approaches

Sorting: In the vineyard and in the winery, take the opportunity to remove any diseased fruit. This will constitute a loss of volume, however, it is better to have less volume of a good wine that more volume of a bad wine.  Loinger et al (1977) studied the effect of Botrytis on Semillon grapes and found that 5-10% infection rate gave a noticeable reduction in wine quality, but still produced a wine considered to be “good” by trained tasters. However, wine made from fruit that was 20-40% infected was considered to have “low” quality.  Some authors also suggest adding 30 ppm SO2 to the grapes in the field to reduce laccase and microbial activity. 

Limit contamination: Whether dealing with a white or a red, limit contamination with proper hygeine. This is not the time to skip cleaning steps or leave the press to clean until the next day. Physically remove any debris by rinsing and scrubbing, then chemically sanitize.  Microbial contamination doesn’t need much to spread to other batches. Also, always process infected fruit last.  

Limit oxygen: Laccase and Acetobacter both need oxygen to do their damage. At all steps, limit oxygen availability to limit the effects of these two mechanisms of spoilage.


White Wine Considerations

  • Limit skin contact, whole cluster press. Botrytis lives on the skins of grapes.
  • If there is a lot of juicing when you load the press, consider disposing of the first 10 gallons or so, as this juice is rich in Botrytis metabolites.
  • Press lightly and separate out press fractions. Botrytis increases the production of glucans, polysaccharides that can lead to poor filterability. These can be treated with enzymes, but are best to keep separate to maintain quality in the larger lot.
  • Treat with SO2 (20-30 ppm) at the hopper and/or in the press pan. Laccase will cause browning quickly.
  • Settle quickly to remove skin components
    • Use settling enzymes at the high rate (or specialized enzymes, check with your manufacturer
      • Use a B-gluconase enzyme in white to break down solids associated with Botrytis and make it easier to clarify and filter later.
    • Treat with lysozyme if you don’t intend to go through malolactic fermentation. This will inhibit Lactobacillus, an opportunistic co-infection of diseased grapes.
    • Alternatively, treat with a chitosan-based antimicrobial to limit spoilage organisms.
    • Consider fining with bentonite to remove laccase.
    • Consider fining with PVPP to remove substrates of laccase that lead to browning.
    • Consider fining with tannin for antioxidant protection
    • Cold temperature limits laccase and microbial activity
  • Rack clean. Target <100 NTU if possible.
  • Get the fermentation going quickly
    • Inoculate promptly with a higher rate of yeast (30 g/hL)
    • Use rehydration nutrients. Infections will eat yeast nitrogen and thiamine, leaving a poor nutritional environment.
    • Choose a yeast strain that has low nutrient needs, is a low SO2 producer, and tolerates higher VA. Bayanus strains are popular choices. Ask your manufacturer for recommendations.
    • Ferment 5 degrees F warmer than usual. This will speed things up, potentially allow volatilization of some VA and limit production of esters that might amplify moldy flavors.
    • Test YAN and feed the fermentations with complex yeast nutrients (not just DAP).
  • Adjust the acid to as low a pH as you dare. This will limit Acetobacter and other spoilage organisms.
  • Limit lees contact
    • Consider racking once during fermentation.
    • As soon as the fermentation is complete, add SO2, settle, and rack off lees.
  • Maintain proper SO2 levels during aging to limit laccase and contaminating microbes.
  • Check filterability before bottling, as glucans can clog filters.


Red Wine Considerations

Many of the same principles apply, but reds are difference as you cannot fully limit skin contact.

  • SO2 is tricky here, as oxygen is needed for tannin polymerization and color fixation. However, SO2 is useful for inhibiting laccase, spoilage microbes, and binding oxygen.
  • Plan for short maceration time. No cold soak, no extended maceration. This will lead to loss of tannin and color, though.
  • Treat with a chitosan-based antimicrobial to limit spoilage organisms. This will require inoculation for malolactic fermentation.
  • Ferment on neutral oak chips to contribute tannin for color fixation
  • Use fermentation tannins to bind laccase and provide antioxidant protection. These also help build mouthfeel and structure that have been limited by infection. Add half at the crusher and half at the first or second punchdown or pumpover.
  • Natural yeast derivatives help build colloidal structure, which is affected by infection.
  • Consider using enzymes to allow fast extraction of polyphenols with less working of the skins.
  • Inoculate with low VA low SO2 producing yeast with low nutrient needs at a higher rate (30 g/hL) with proper rehydration.
  • Adjust acid to lower pH as soon and aggressively as you can.
  • Measure YAN and add complex nutrients.
  • Ferment warmer (5 degrees F) to help blow off VA and speed up fermentation.
  • Rack off lees during fermentation using delestage.
  • Press lightly and separate press fractions.
  • Allow for good settling and rack off fermentation lees clean.
  • Inoculate malolactic fermentation with SO2 tolerant strain. Use malolactic nutrient.
  • Add SO2 and rack off lees after malolactic fermentation.
  • Maintain SO2 rate during aging to prevent laccase and microbial activity.

References:

  1. Penn State Extension “Fermenting with Botrytis 101”
  2. Penn State Extension “Managing Sour Rot in the Cellar
  3. Production considerations with Rot Compromised Fruit, Bruce Zoecklein, Vintner’s Corner


High pH and Acid Adjustments

Some vintages bring higher than normal pH values, even at lower brix levels. Following is a brief review of the concepts of acid and pH which may help inform winemaking decisions regarding acidity and acid adjustments.


Figure 1: Structure of Tartaric Acid

The predominant acids in juice that contribute to acidity are tartaric acid and malic acid. There are others present in smaller amounts, such as citric acid, that can contribute to the flavor profile later, but, the effect on acidity is mainly due to tartaric and malic. Acids are defined as molecules that will will dissociate a proton in aqueous solution.  “Strong” acids fully dissociate, so that all acid molecules have given up a proton, while “weak” acids are in an equilibrium where some molecules have dissociated and others have not. Both tartaric and malic acids are weak acids.


Figure 2: Structure of Malic Acid

In the wine lab, two measurements are routinely taken to assess the acidity of the juice or wine: pH and TA. TA is a measure of how many protons have been given up when titrated with base up to pH = 8.2. Tartaric acid will give up two protons at this pH and malic acid will give up one. The TA contributes to the acid flavor of the wine, and different acids have different effects on the sensory characteristics (malic acid vs. lactic acid).  Generally TA of finished wine ranges from 5.5 - 8.5 g/L. 

pH is a measure of the hydrogen ions currently in solution. It is sometimes referred to as acid strength. The pH scale is both inverse (a solution at pH = 3.0 has more hydrogen ions than a solution at pH = 4.0) and logarithmic (there are 10 times more hydrogen ions at pH = 3.0 than at pH = 4.0). Generally, white wines fall in a pH range of 3.1 - 3.4 and red wines fall in a range of 3.4 to 3.8. 

The pH of a wine is important because it affects the microbial stability of the wine, the efficacy of SO2, and the color of red wine. Some spoilage microbes are inhibited by lower pH (Brettanomyces is less active at pH<3.8, though this does not fully prohibit Brett infection).  A larger proportion of SO2 is in its molecular (anti-microbial) form at lower pH.  For example, to achieve a molecular SO2 of 0.8 mg/L, one would need 40 ppm free SO2 at a pH of 3.5, but 79 ppm at a pH of 3.8. Low pH also shifts the equilibrium of anthocyanin molecules from the colorless state to a red pigment (10% are colored at pH = 4 while 20-25% are colored at pH = 3.4-3.6).

Though tartaric acid and malic acid contribute protons to solution, thus lowering pH, the relationship between TA and pH is not linear because of several factors. Cells of living organisms must remain within limited pH range to sustain all the reactions needed for life, so they contain molecules that will buffer acid/base changes. These molecules will take up or give up protons based on the current situation. This means that not all acid added to the solution directly contributes to pH. It depends on the buffering capacity. Buffering capacity can be different depending on growing conditions, grape cultivar, and overall health of the grapes. 

A general rule of thumb is that 1 g/L of added tartaric acid will lower pH by 0.1.  However, the best way to determine the effect of acid addition in your juice is to do a bench trial with sequential additions of concentrated tartaric acid and record the change in pH. If you would like a written protocol for this, please contact me directly.

Role of potassium

One of the most common questions so far this year is whether or not a wine will hold onto acid once it is added. This has a lot to do with the possum level in the juice/wine. Potassium comes up through the roots of the plant and is actively transported into the grape berry in exchange for protons. Potassium uptake is increased by shading in the berry, and by warmer temperatures.  Since it is carried by water as it comes into the plant, rainy seasons lead to more potassium in the grapes. Since potassium enters the grape in exchange for hydrogen ions, the more potassium there is available to the plant, the lower the proton concentration (and higher pH) in the berry.  This, coupled with warm nights consuming malic acid, is likely a major factor leading to the high pH in grapes this year.

Potassium also plays a role in acid addition to juice and wine. When tartaric acid is added, some of the tartaric acid will bind with potassium to form potassium bitartrate (KHT). When KHT reaches saturation, it will precipitate out of the wine. This process is what is occurring during cold stabilization, essentially removing tartrates before they form in the bottle. When KHT precipitates, it will lower the pH if it occurs below pH = 3.6, but if it occurs above pH = 4.0, it will raise the pH.  (The effect between 3.6 and 4.0 depends on the buffer capacity of the wine.) KHT is more soluble in juice than in wine, so the overall effect of acid addition may change during aging as KHT forms in cold cellars over the winter.  This means that when you do tartaric additions, it is likely some of that tartaric will precipitate out as KHT. However, when that happens, the potassium is taken out of solution and subsequent additions will be more likely to remain in solution. So, you may need to do multiple acid additions, but you should get better retention each time.

Winemaking considerations

What do you do in high pH years? There is no one answer to this question, but here are a few suggestions:
(1) Keep in mind targets that you are comfortable for in terms of stability and aging. It is unlikely you will reach your ideal numbers, so set a reasonable target.

(2) Harvest earlier and chaptalize if the fruit tastes ripe.  

(3) Add tartaric acid at the juice stage to help with microbial selection and color stability. Once anthocyanin bind to tannins, their form (colorless or red) is fixed.

(4) Some yeast strains will consume malic acid during fermentation. Avoid using these strains on wines not meant for malolactic fermentation. (Your manufacturer should be able to tell you if your yeast falls into this category)

(5) Do bench trials of acid additions to determine how much addition is needed to achieve targets. You can also set up taste trials of various additions. Due to buffering capacity, the "norm" of 1 g/L = 0.1 pH point may not hold.

(6) On white wines, think carefully if you want to undergo malolactic fermentation, which will likely shift pH even higher.


References

Zoecklein (2000), Enology Notes #6

Zoecklein et al (1995) Wine Analysis and Production, p 76-83

Boulton et al (1997), Principles and Practices of Winemaking, p 233, 258, 449-451, 534 


Contact

Sign up for our Mailing List